Showing posts with label Floral. Show all posts

Thursday, September 24, 2015

Monochromatic Floral Stamped NOTD

Hey y'all! For today's post I have a super pretty design that I did for a wedding that my husband and I went to last weekend. I recently grabbed a few beauties from the China Glaze fall collection - The Great Outdoors, and two looked so good together that I couldn't resist using them.


Tuesday, July 14, 2015

Twinsie Tuesday: Revisit A Theme

Hi friends! Well it looks like I missed a whole week of posting and we are back to another Twinsie Tuesday post. In my defense, I have been working on the story I am writing like crazy. Unfortunately nail polish and blogging have been severely neglected, but I do have some Sally Hansen polish that I need to post in the very near future!

For today's Twinsie theme, we are revisiting a previous them that we missed out on the first time around. One of the first themes I remember skipping was the Negative Space theme. It has been a nail art "to-do" for quite some time and with all the craziness of my life over the last year, it just never happened. So yay for second chances!

Tuesday, May 26, 2015

Twinsie Tuesday: Mattify!

Hi friends! Hope you all are having a great Tuesday! This week's Twinsie Tuesday theme is "mattify." I decided to do a matte floral design. And honestly, I'm not really feeling it.

Thursday, May 21, 2015

Black & Mint Green Stamped Floral Skittlet

Hey guys and gals! It's has been waaaay too long since I have done any stamping. File it under the category of "Life is a total drain on anything fun" along with the ridiculously long break from nail art I took. But sometimes all it takes is really great materials to kick inspiration in gear. After I swatched the Ellagee Grey Scale collection, (read that review, here!) I was sure that Ebony, the black polish in the set, would make an awesome stamping polish. And I have been wearing Mint Succulent from Fair Maiden Polish for a few days, so.... Well you can see where I'm going with this right?!


Thursday, July 31, 2014

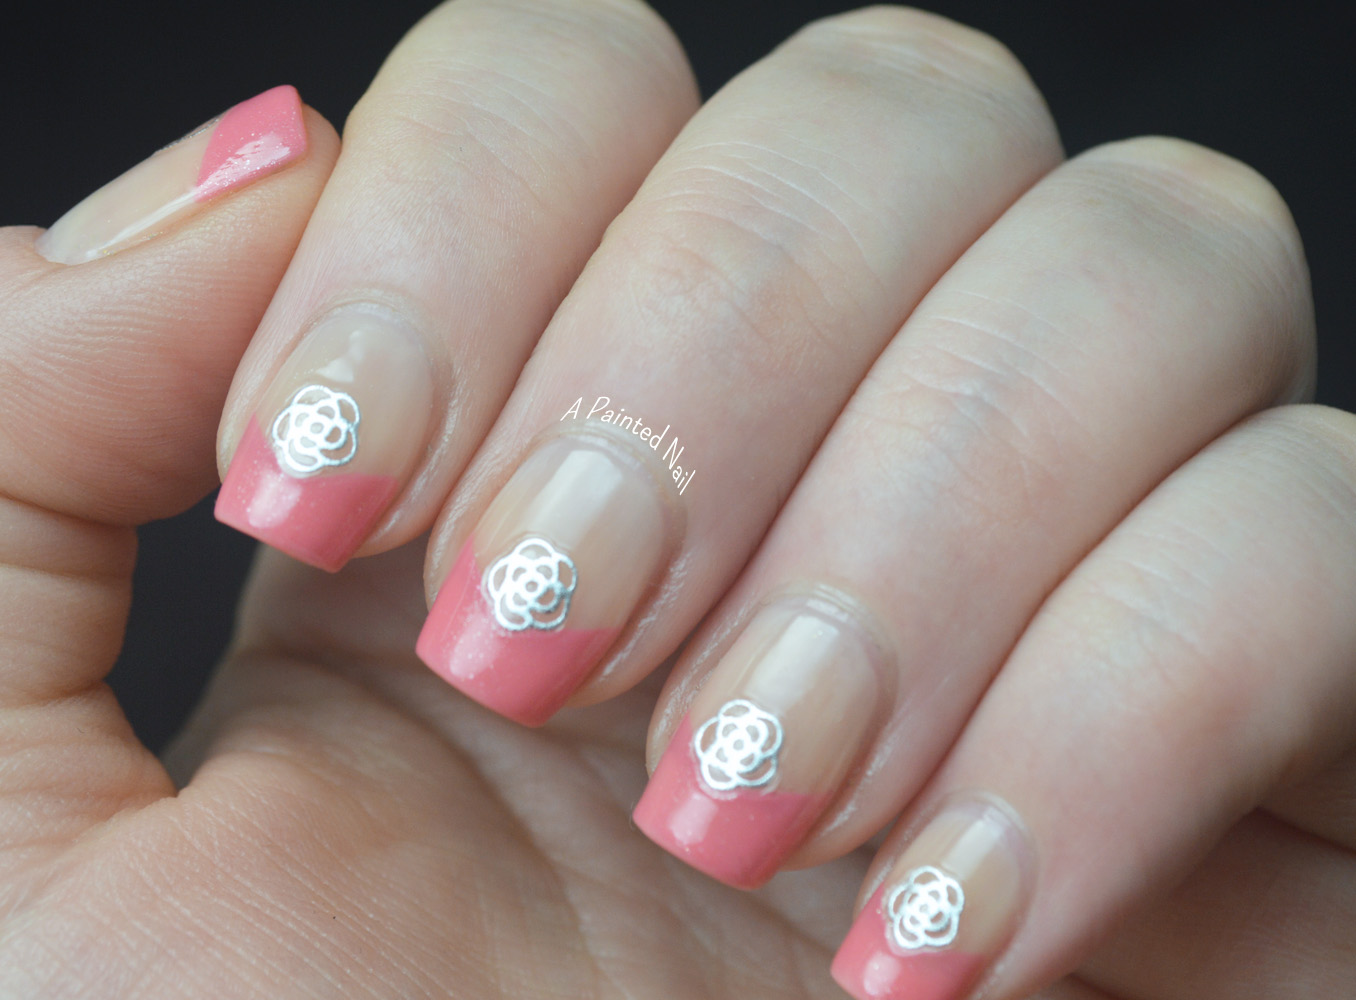
Flirty French with Born Pretty 3D Floral Stickers

Hey everyone! Today I have a fun nail art post with some Born Pretty goodies! This is the first of three posts featuring different nail art embellishments that I was sent to review for you guys. First up are some 3D floral stickers!

Please Note: Products shown were provided by the company/creator for review purposes.


The package contains one sheet of 30 floral stickers in three sizes. Directions for use are printed on the back. Since the flowers look so delicate, I decided to go with something fun and girlie.


Used:

O.P.I. - Glints Of Glinda
RBL - Coquette

Chevron vinyl nail stickers

The floral stickers were very easy to apply. After I painted my nails, I simply peeled off a sticker from the sheet using tweezers and placed it on my nail. I used my current go-to top coat, KB Shimmer COT to seal the stickers. They also come off easily with nail polish remover too.


The stickers are fun and super easy to use. There are five different designs to choose from: bows, flowers, and assorted filigree. It is a simple way to embellish your nails without a lot of hassle. And you can get as creative as you want with them!

I have a 10% discount code to go along with all the Born Pretty stuff I will be reviewing over the next couple of weeks. So when you see something you like, be sure to use the code GETG10 at checkout!

Please Note: Products shown were provided by the company/creator for review purposes. All opinions are my own. For more info, please read my disclaimer. 

Born Pretty 3D floral stickers and other nail art related products are available on line. 3D stickers retail for $2.19 a sheet. Prices vary by item. 

Tuesday, July 15, 2014

Twinsie Tuesday:One Stroke Flowers

Hey friends! Another Tuesday is upon us, and that means it's a Twinsie post! My apologies for not having this up earlier in the day. I forgot to schedule it yesterday when I wrote it, and I have been curled up in bed all day fighting a nasty stomach bug! Not sure if it was food poisoning or a virus, I'm hoping it's not the latter, I don't want the hubby or girlie getting sick!

So this week's theme is "one stroke flowers," a painting technique that is popular among folk art that creates the look of gradient flower petals using two colors at the same time. My mom perfected this technique years ago, but on canvas as opposed to nails!

In all honesty, I'm not a huge fan of this look. Not to mention that it (almost) requires using acrylics to achieve it, and I prefer to use strictly polish for my nail art. But I did it, and while it's not my favorite, or my best, I am happy that I at least attempted it and didn't give up. Cause I really did not want to do it, lol!!!


Used:

KB Shimmer - A Touch Of Glass
O.P.I. - MBSW
KB Shimmer - Radiant Orchid

Small square nail art brush

I used polish for the flowers as opposed to acrylic paints, and I'm sure that was some of the problems I had with the petals. But not every post or attempt an be great, so here's to the failures!!


What do you think of one-stroke floral nail art? Are you a fan, or is this a look that you would pass on? While you're thinking about that, be sure to head on over to the rest of the Twinsie Tuesday bloggers and check out their attempts!


Alaina at The Little Canvas
Amanda at Amandalandish
Amber at Nails Like Lace
Anna at Going to the Showing
Bridget at A Painted Nail
Chelsea at Nailed Blog
Cordia at Seriously Swatched
Elizabeth at Did My Nails
Jessica at Blue Velvet Lacquer
Kelly at Tuxarina
Lakeisha at Refined and Polished


   Marisa at Polish Obsession
Róisín at Cuti-CLUE-les
Stephanie at A Little Polish
Tiffany at Polished To Precision

Saturday, April 19, 2014

Spring Easter-y Nail Of The Day

Hello friends! Hope you all are having a nice and relaxing, possibly fun Saturday! I am home alone for the day - my little one is off with the grandparents for the weekend and my big one is stuck at work today. So I am spending my day with a pile of laundry, my ipad and the Doctor!

Today I have my spring easter-y nails to share. We don't really go for the holiday, so this isn't an official holiday themed post, just something I thought was pretty and fun! But since it is Easter tomorrow, my pinterest feed has been bombarded with with egg type crafts and I saw one in particular that I knew would be awesome if it were painted on my nails.


Used:

O.P.I. - Live.Love.Carnival
O.P.I. - Amazon...Amazoff
O.P.I. - I Just Can't Cope-Acabana
O.P.I. - MBSW
O.P.I. - Black Onyx

Dotting Tool

My design may be a little unorthodox, but I am so in love with the outcome! I was immediately drawn to the inspiration, everything about it is so visually pleasing and I knew it would be perfect for nail art. The folk art elements are really fascinating, and I think I could get at least three more designs from them! Yay for being inspired!


I actually entered these in an Easter themed contest on Nailpolis. If you haven't checked Nailpolis out yet, you really should! There are tons of great artists on there, as well as fun contests. I am super pleased to be a part of it, so I hope you will give it a look!

I hope you all have a wonderful weekend and get to spend time with people you love. I must be off, now, the Doctor is waiting!

Saturday, April 5, 2014

Dandelion Nail Of The Day

Hey guys and gals!! How is your weekend going? I think we may have some rain today, which is awesome and I don't mind one bit. My veggie garden has a ton of new little sprouts popping up and could use a good soak! We also have dandelions all over the place and while My husband hates them because they are "weeds," the girlie and I are quite fond of the puff balls. 

I have wanted to do Dandelion nails for as long as I can remember. But I was always a little worried I lacked the skill or the right inspiration for the design I wanted to create. Then I saw a fabric swatch at the craft store by my house and it was perfect. Dreamy and soft, everything a dandelion should be. 


Used:

Sally Hansen CSM - Resurrection
O.P.I. - Don't Bossa Nova Me Around

Dotting Tool

Can I just say how much I love these?!?! Everything is just so awesome. I love the colors together, and I love how the dandelion puffs turned out. Sigh... It is so nice when something translates perfectly from your head to your canvas. While the colors don't quite match with my inspiration, I really am pleased with the two together. 


While I may not be one to do complicate floral designs, I do appreciate them. But simple is my aesthetic. And I think I do my best work when I stick to that idea. 

So what is your favorite floral motif? Have you tried to replicate it for nail art

Thursday, March 13, 2014

Spring Daisies - Lime Crime Nail Art Week

Hello friends! So this fun filled week packed with nail art and Lime Crime awesomeness is almost over! But I couldn't let it go without doing a springy floral design! I mean, with these bright pastel beauties, floral is a no brainer, right?!

My favorite flowers are daisies. Plain and simple and beautiful daisies. Nothing makes me smile like a bouquet of these adorable flowers! So, since I have never done a daisy design, I figured now would be a most excellent opportunity!


Used:

Lime Crime - Lavendairy
Lime Crime - Milky Way
Lime Crime - Crema De Limón
Lime Crime - Pastelchio


How cute are these?!? Gah, I want to hug them...but that would be weird. Okay! So, just like the flower, these were super simple to do, and turned out just like I wanted - which never happens! I may have a hard time topping them, these are easily my favorite from this week!


Tomorrow is the last post I have planned for the Lime Crime nail art week, and I'm thinking tribal! You gotta end something like this with a bang, right?

Lime Crime Les Desserts d'Antoinette is available on line at Harlow & Co. Products retail for $8.50 CAD (that is $7.73 USD) a piece

Thursday, February 27, 2014

Guest Post From Casey Lane Loves Polish

Hey guys and gals! Today's guest poster is my wonderful friend, Casey from Casey Lane Loves Polish. She is such an awesome lady, and one of the most talented nail artists I know. She also kills it with the macros!

-------------------------------------------------------------------------------------------------------------------------------------------------------------------

Hello everyone! How are you all doing? I was so excited when Bridget said I could do a guest post for her. She is one of the first friends that I made in the nail community, and she's one of the sweetest girls on here I've met. Hopefully my little post will help her out! :) 

This week work has been especially stressful for me, and my hubby's work has been stressful for a long time. That takes a toll on everyone in the house, so I haven't taken much time for nail art. Someone told me recently (my therapist to be exact) that nail art is therapeutic for me, kind of like my version of meditating. I believed him, but hadn't actually put it to a definitive test. Until Thursday night. I had spent the previous 2 days working on an almost 30,000 line spreadsheet and around 8 pm I started getting more emails (from our CEO) about it... it was like a stress switch. I was instantly tense and anxious and worried all wrapped into one. So I decided to put the "nail art meditation" theory to test. Sure enough, he was right, he pretty much always is but don't tell him I said that. After spending a little time on a simple but favorite nail art design I felt better. My head was clear and I actually felt relaxed. I wasn't super surprised, but I was so happy to see and feel such instant results. 

So, here is the result of my stress induced nail art meditation. :) Some simple vintage rose nail art using a couple of my new OPIs and a couple of old favorites. 


For this manicure I started with 3 coats of OPI Hey Baby from the new Gwen Stefani Collection on my pinkie, index finger, and thumb. Then on my middle and ring finger I applied 2 coats of OPI Don't Bossa Nova Me Around. 

To make my roses I used all dotting tools. I go back and forth on my technique on these... sometimes I prefer brushes, others I want to use dotters. I think the dotting tools are maybe a little easier, but that could have just been the day. 

I used Hey Baby for the base, OPI My Very First Knockwurst for the swirls, and for the leaves I used OPI Jade Is The New Black and Thanks A Windmillion. After a little dry time I topcoated with Glisten and Glow HK Girl topcoat. 

I love these nails so much. I'm still wearing them, and I'm a little sad to take them off. But I have swatching to do, duty calls. :) But I have enjoyed this mani while I've been wearing it. 

What do you think? Have you all tried vintage roses? If you haven't you definitely should! It's one of the easiest nail art designs and has a big impact. There are tons of tutorials online that I've used, and combined, to find what works best for me. Be sure to follow me on Instagram (@caseylanelovespolish) and on my blog (www.caseylanelovespolish.com) for more manis and swatches! 

I hope you all love this mani as much as I do! And even though I love guest posting for my friend Bridget, I hope she's up and running again very soon! Thank you again for the opportunity! :) 

**All polishes in this post were purchased by me for my own personal use.** 

-------------------------------------------------------------------------------------------------------------------------------------------------------------------

I love vintage roses, and I definitely need to give them some love once I get my camera situation resolved. And I so understand the calming effects of nail polish! Of course, it could totally be the fumes. Just sayin...

Thanks so much Casey!

Tuesday, February 11, 2014

Messy Spring Floral Nail Of The Day

Hey y'all! So I recently stumbled on a nail art blog/tumblr full of rad designs and tutorials. Candice of MrCandiipants, is crazy talented and so funny! I just adore her! One of her more recent designs really caught my eye, so I promptly watched the YouTube video and painted myself some pretty nails! Also, you should really check out her other tutorials. I'm not one for YouTube videos, but I have watched a lot of hers lately, she is quite entertaining!


Used:

O.P.I. - MVIB
O.P.I. - Funky Dunky
China Glaze - Tart-y For The Party
Zoya - Marley
Essie - Navigate Her
Zoya - Josie
Zoya - Darcy

Nail art brush

Floral designs aren't something I normally do, but I am really loving this technique. It is messy and a bit chaotic, but so super pretty! And of course I am still stuck in this spring-ish color palette. I just can't stop myself. 


So that's all for today! I have an awesome polish swatched and a really fun Valentine's Day post coming up. Otherwise, have a great week!

Monday, December 23, 2013

Poinsettia Nails - Holiday Nail Art Spectacular

Hi friends! Happy Monday! Are you guys ready for the holidays? I am still making cookies! It has taken a little longer than normal to get all my baking out of the way, my kiddo got a cold yesterday and I have been playing nurse along with baker!
 
I am trying to get the rest of my holiday posts up before all the madness starts, so I hope you guys don't mind a short post! Besides, we all know it's about the pics, right?! ^_^


Used:
 
O.P.I. - MVIB
O.P.I. - FDATGG
O.P.I. - Black Onyx
Zoya - Logan
Zoya - Ziv
 
Nail art brush
 
This design is kinda sentimental for me. My mom's favorite flower is the poinsettia, and my sister and I would get her one every Christmas. So the flower always gives me warm fuzzies as an adult. The leaves were kind of a screw up, but I am okay with the end result. I used the G&G HK Girl top coat for this design.


I know I have mentioned it before, but MVIB is seriously such a great base for nail art. I grab it as much as MBSW when I am planning out a design. If you don't have either, they are great staples for a nail art collection.

I am also trying out the Glisten & Glow HK Girl top coat. It is really great for nail art purposes as well, I have yet had a smear with it, even if the polish is still a little wet. I will be adding it along with every other TC I have tried to a comprehensive guide that I have been working on almost all year. I hope to have it up early 2014 (how crazy is it that 2013 is almost over?!?!).

Hope you guys have a great day & look for a fun post tomorrow, perfect if you are looking for a polish to wear to a holiday party!

Saturday, October 19, 2013

Rose Cutaway

Hello my fellow polish friends! I hope you all are having a great weekend! I have a bit of nail art for today's post, something I have wanted to do for quite a while, but always forgot about.
 
The original inspiration comes from a set of NCLA wraps, but also from the most awesome nail art blog,  One Nail To Rule Them All.


Used:
 
O.P.I. - MVIB
(besides MBSW, this is an amazing base for nail art!!!)
O.P.I. - Black Onyx
Color Club - Coral Cascade
Essie - A Crewed Interest
Revlon - Posh
 
Striping tape
Nail art brush
Dotting tool
 
I really love this. So frickin much! And even though it looks complicated, it's super easy! I got quite a few compliments from the others moms at my kiddo's school when I wore these. One even asked if I would do her nails, if she paid me!


Well, that's all for today! I have a tooooon of swatching to catch up on, so hopefully, there will be lots of pretty polish on the blog next week!


Thursday, September 5, 2013

Studded Roses

Hey y'all! Hope you all are having a great week! My apologies for the lack of posts, I have been so busy getting my kiddo ready for school that I haven't had a lot of extra time. But now that she is gone most of the day, I will be able to play more often!

Today, I have another mani inspired by Marta of Chit Chat Nails. She is a master at skittle manis and I find myself looking to her blog more and more for inspiration. You should really check it out, if you haven't yet!


Used:

Julep - Julianne
Essence - Modern Romance
China Glaze - Mimosa's Before Mani's
O.P.I. - MBSW

Born Pretty Square Studs

Nail art brushes
Dotting tools

I love the vintage feel this has. Normally, I can't wear blues like this, gives me lobster hands. But I do so love the dusty blue/greys so much! The roses give it just enough warmth to even out with my skin. And of course the studs, cause studs make everything better!

 
Hope you all have a great day!

Tuesday, July 16, 2013

31 Day Nail Art Challenge: Inspired By Artwork

Hey all you lovely people! Hope your week is going well! We have a bit of sunshine today, after an all day downpour yesterday. Rain is great an d all, but all frickin day is a bit much. My garden is looking rather water logged today!
 
Since it is Tuesday, that means another challenge post is up today! I have been eagerly waiting for this particular theme, because I am a huge art dork. Fun fact: I was a fine arts major in college and took long boring classes about art history! So I have a fair bit of knowledge pertaining to artists and their bodies of work. Finding a piece and translating it to nail art was a bit of a challenge, but after I decided to go for a more graphic style, everything fell in to place. One of the best graphic artists, I think, is Andy Warhol. His imagery is iconic, bright and totally eye catching. One of my favorite pieces is an earlier lithograph called "Flowers."


Used:
 
Essie - The More The Merrier
Sally Hansen Xtreme Wear - Black Out
Color Club - Coral Cascade
Sally Hansen Insta-Dry - Man-Go Team
Julep - Lexie
China Glaze - Passion For Petals
 
Nail Art Fan Brush
Dotting Tools
 
I cannot believe how awesome these turned out!!! I am so so so happy with everything about them. And I am totally gonna rock these all day long.
 
For the grassy back ground, I used the fan brush that came with my nail art brush set and I really love the grungy result. Dotting tools for the flowers and topped it all with NYC Grand Central Station (thinned down an excessive amount). Pop art on my finger tips! 

 
 I would really love to play around with this style and do different color combos. Maybe some like the NARS palettes that were released last fall?

Next up is "Inspired By A Flag" and I have noooooo clue what I am going to do! >_<

Thursday, May 30, 2013

31 Day Nail Art Challenge: Floral

Second post today! Floral is the theme for this post, and I was inspired by this poppy design from Little Nails. I actually found it via Pinterest and had to do some digging to find the proper source, as it wasn't credited at all. I love using Pinterest for nail art inspiration, but jeeze it can be difficult to find the original artist.

 
Used:
 
O.P.I. - My Boyfriend Scales Walls
Maybelline Color Show - Paint The Town
Sally Hansen Xtreme Wear - Black Out
Revlon - Posh
 
Dotting Tool
Nail Art Brush
 
I really love poppies. They are so simple, yet so beautiful at the same time. Overall, I am really pleased with how this turned out. I kinda wish I had made different colored poppies, but was feeling completely uninspired at the time. Still pretty, I think.


A new Fashion Friday collab post is on the schedule for tomorrow, and it's pretty dang awesome!

Friday, April 5, 2013

Fashion Friday #5

Hey all! I'm back with another Fashion Friday post! Camille has put together some really great spring looks this week and I had a lot of fun creating some manis to go with them!


Used:
 
Julep - Teresa
Sally Hansen Xtreme Wear - Black Out
 
Striping Tape
 
This look is so classic and clean, that I couldn't help but put together a classic French mani. But you know me, I am not one to follow the rules ; ) I love the double stripe french tip and adding it to a couple of accent nails is a fun way to funkify a french manicure.


Used:
 
Sally Hansen Xtreme Wear - Black Out
Sally Hansen Xtreme Wear - White On
Revlon - Urban
Nails Inc - Baker St
SOPI Betsey Johnson Mini - Too Too Turq
SOPI Betsey Johnson Mini - Yellow My Name Is Betsey
 
Sharpie Fine Point Marker
 
I love this outfit so hard. It's cute, fun and wild! I tried so hard to get the floral print to translate onto my nails, but I feel like I failed terribly. Bah. Sometimes this nail art business is rather frustrating.
 
Be sure to check out the other great looks Camille put together and I'll be back next time for more goodies!

Sunday, March 31, 2013

Nail Of The Day: Spring Flowers

Hey everyone! Happy Easter to all those who celebrate. I am spending my day with my husband and daughter enjoying the beautiful spring weather!

I have been doing a little "market research" with nail strips and used the Sally Hansen Salon Effect nail strips for my first test run.

Please Note: All products in this post were purchased by me for my own personal use.


Sally Hansen Salon Effects Girl Flowers & China Glaze Passion For Petals


The strips are cute and I really like using them for accent nails. Easy enough to apply, and I got a lot of wear time out of them before I got bored & removed my mani. They lasted a good 3 days before I noticed any tip wear.
 
Have you used nail strips? I think they would be great for nail art!
 
Sally Hansen Salon Effects are available at numerous locations. They retail between $7-$10 per package.
 
Products shown were purchased by me for my own personal use. All opinions are my own.
Related Posts Plugin for WordPress, Blogger...